


 Guild Pro '93 replica
2nd August 2005
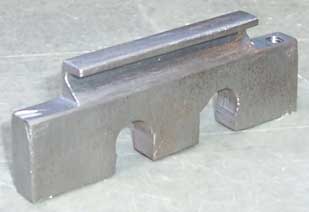
Today I didn't have much time so I decided to quickly create the brass tremolo arm nut/holder. I started off by cutting sufficient brass from a brass rod I had. Next I drilled out the centre hole for the tremolo arm screw to fit through, followed by drilling another hole in the side for the tremolo arm.
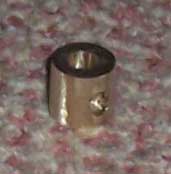
I then decided to do a quick test using some straight stainless steel rod for the arm. The results were very impressive and pleasing.
3rd August 2005
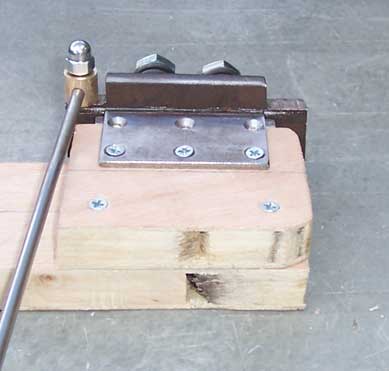
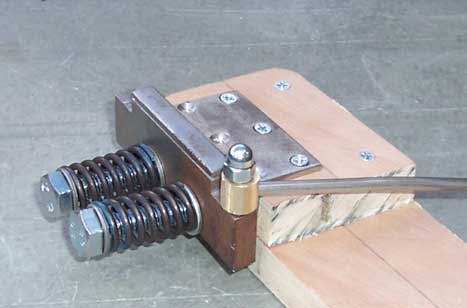
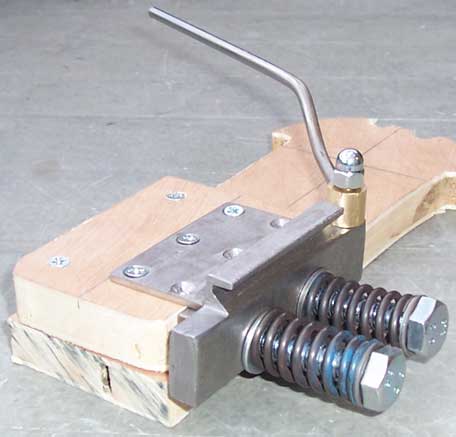
Next I simply bent the stainless steel rod to roughly the shape that I want. As you may see from the picture the arm look a little bent just before it enters the brass holder. This is down to the fact that if it was straight you would not be able to push the arm far enough down as the body would get in the way.

6th August 2005
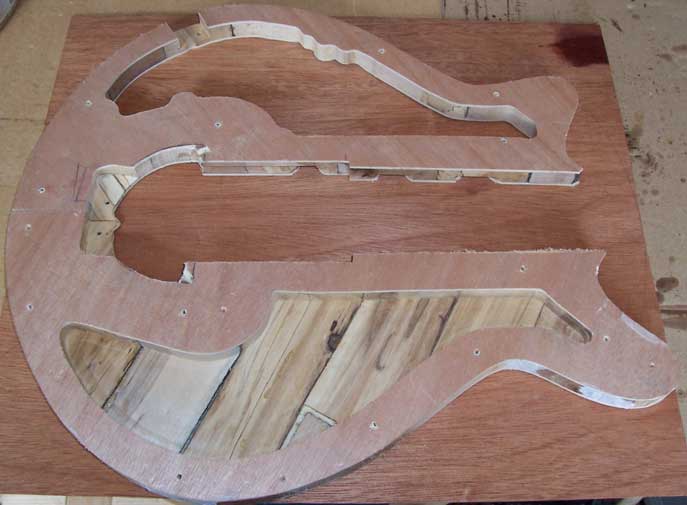
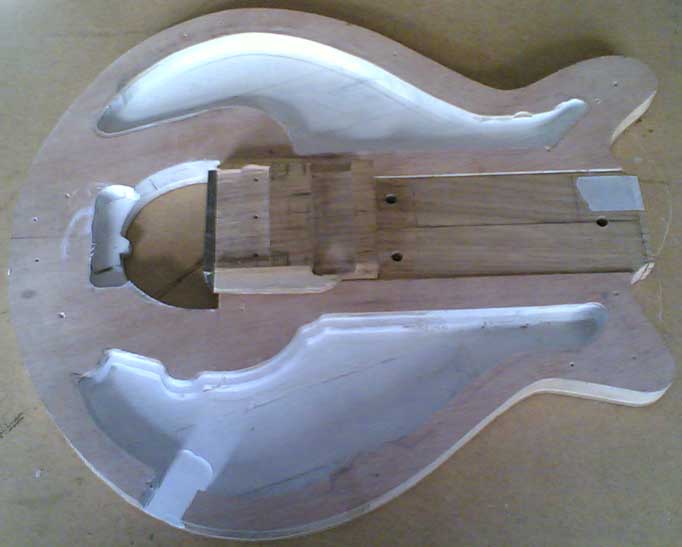
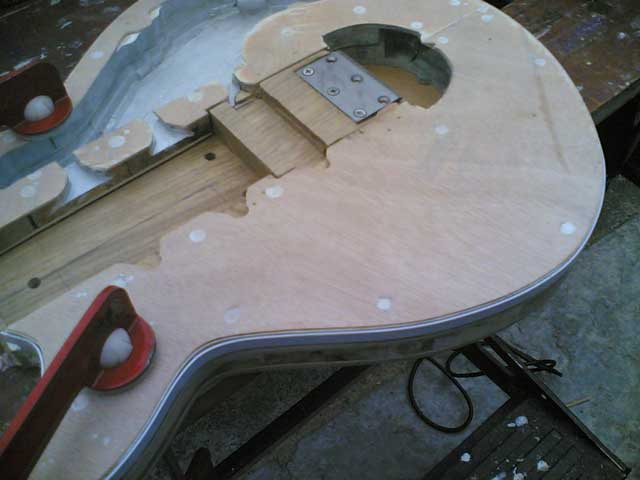
We firstly started out today by routing out the correct area for the control cavity. We original used a 30mm guide bush on our router to route out most of the wood. So, with the top screwed to the bottom, we used a bearing guided bit to route out the precise area according to our plan.
Next, we routed the 'lips' that the control plate will sit on. This was simply done freehand, but using a constant depth. Whilst doing this we route out the area that the jack socket will be.
After careful consideration for how the tremolo unit maybe removed after the guitar has been finished, we decided to create a hidden recess area so the bolts can be fully unscrewed and removed without creating a larger 'hole'. This can be seen from the first enlarged picture below.
Finally for today, we screwed the bolt retainer to the oak centre. We felt we needed to do this prior to attaching the three blockboard sections together, as it would be more difficult to do so after.
10th August 2005
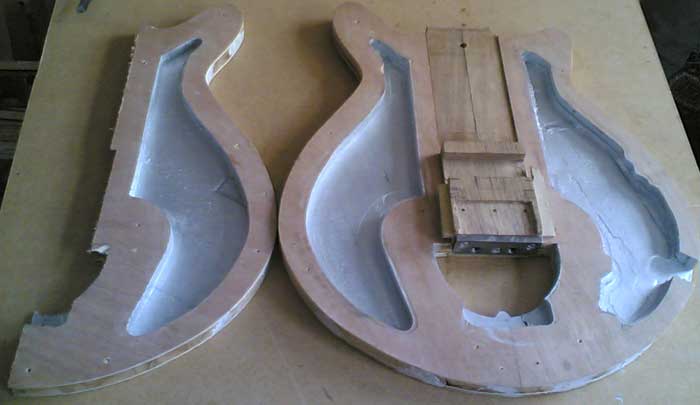
Our main task for today was to attach all the blockboard section together. But before we could do that we had to 'line' the cavities.
After careful consideration for various options, which I will discuss in the 'Designing the Body' section, we decided to use a special metal paint that is used for picture frames, paintings, etc. But before we applied this paint we needed to prime the surface. We achieved this by applying a simple primer to the cavities.
Whilst the primer was drying we looked at the neck again. We refined the radius of the neck using the radiusing block that we created before. By this time, and after lunch, the primer was dry. So we now applied the metal paint on top of the primer.
We left this to dry and continued with the neck. As the radiusing was now complete we were left with sawing the fret slots. Due to lack of time for today we stopped creating the fret slots and moved to attaching all the blockboard sections together.
We simply glued all the blockboard sections together and then screwed the top sections to the bottom one. This would give a very strong bond. The final touch was to 'fill in' the recesses left by the screws as the veneer may sink into the recess. After applying the filler this would give a very flat surface for the veneer.
 Before filler
20th August 2005
Today I had great expectation as to what I wanted to achieve, but unfortunately I was very much dreaming. Once I came back down to reality we got underway, and to be honest, neither of us wanted to stop because we are getting very close to the end now.
We started off by cutting the tremolo bolts to the correct length, so that they can fit into the cavity and screw in and out, and have the capability of being changed should the need arise. We also cut a slot in the end of the nuts so that we can adjust the nuts once they are in.
To be able to gain access to the tremolo nuts we needed to drill two holes to allow a flat headed screw driver through the body and to the nuts. We decided to drill a farely large hole in the blockboard, but then a smaller hole in the veneer.
Whilst my girlfriend's dad was working on the tremolo bolts and holes, I was working on the fretboard. I cut the remaining slots for the frets and moved onto refining the neck.
After the bolts and holes were finished he moved onto sanding the body. I continued refinging the neck, more precisely, where the neck joins the body. We have done this before but when the neck was fitted to the body I was not happy with it as it was difficult to get to the upper frets. We also sanded the entire neck down.
We now moved onto how we were going to have the binding where the neck joins. In the end we decided to have a triangular piece of oak across the end of the oak centre and run the white binding on top of that.
Next we quickly applied some metal lacquer to the tremolo block and the knife edge. This was purely to protect them from tarnishing.
As a final task of the day we screwed the knife edge to the oak centre. This proved to be a little more difficult than we had hoped as one of the screws was higher than the knife edge. We over came this by simply filing down the top of the screwed head.
Unfortunately I have not got any pictures of todays events as there is not alot to show.
26th August 2005
I did not have much time today so I decided to create the nut. This proved to be a very quick job to do.
I cut a small piece of black plastic roughly the size of what the nut should be, then I created the 'slot' for the truss rod cover using a file. After that I then rounded the top of the nut to match the radius of the fretboard, followed by cutting the 'string guides'. As a final cosmetic task I rounded off the 'top' like most nuts are.
27th August 2005
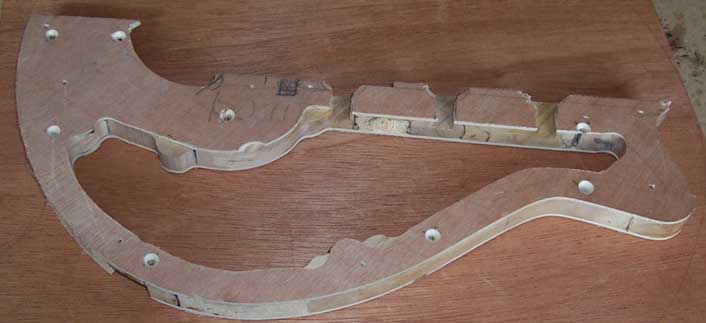
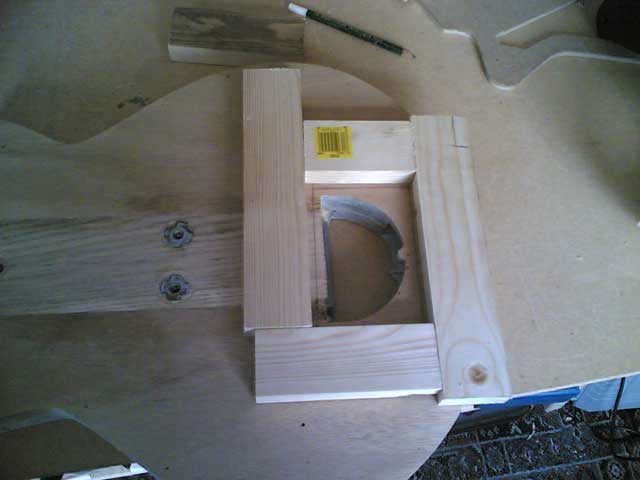
To start today we decided that we needed something to support the veneer on the back of the guitar where the tremolo cavity is. To be honest, we should not have routed through the entire body when doing this in the first place. So, we started off by creating a recess for a 'lid'. We achieved this by using a router with a guide-bush. So, we had to rig something for the guide-bush to follow, as shown below.
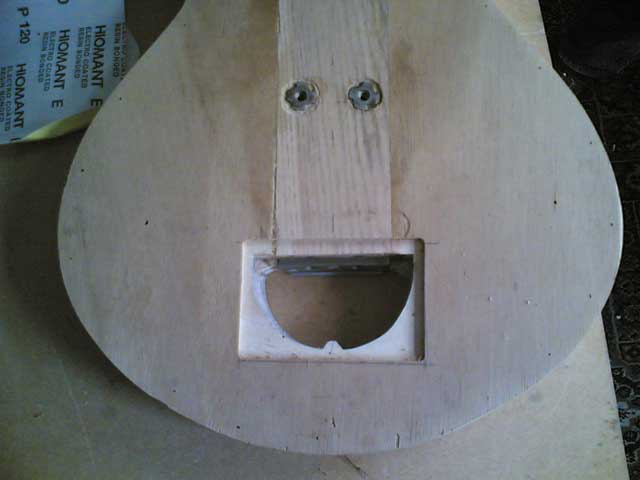
Once we had this routed we cut some 4mm thick plywood to fit into the recess.
Picture coming soon
Next we looked at routing the binding channel. The binding that I have is approximately 1.6mm thick, and my veneer is 0.6mm thick, so I need a channel of 1mm. The closest bearing guided router bit would route approximately 2mm, so we had to rig something up to get to the correct depth. The final solution was to run some of the binding around the body and use that as the guide. This would give a channel of approximately 4mm. The excess can be sanded off after it has been attached to the body.
We routed both top and bottom of the guitar using the same technique.
Next I marked out the fret markers. Once this was done we drilled reference holes for the fret markers. We did this so after we had 'finished' the neck/fretboard we knew where the fret markers should be.
After that was done we refined the neck to a final stage, and thoroughly sanded it down. The neck is now finished except for an actual 'finish'. next we dyed the fretboard using dark oak dye. This was done as I was not happy with the darkness (or lightness) of the fretboard. On a test piece of ebony we test various methods of getting the fretboard darker. The best solution was to dye it using dark oak dye.
Finally for today, we glued and nailed the tremolo cavity cover on the back of the guitar.